
How to Register Your Globe SIM in 2025: Complete Guide

Quick Answer:
- To register your Globe SIM, go to new.globe.com.ph/simreg. Enter your mobile number, verify via OTP, and submit your ID and details. You can also register via the GlobeOne app.
SIM registration is more than just a legal requirement—it protects you from scams, identity theft, and unauthorized SIM use. Globe follows the Philippine SIM Registration Act (RA 11934), which requires all mobile subscribers to register their SIM card with valid identification.
Even if you registered in 2023, you may still need to update your information, confirm your registration, or register a new SIM in 2025. By the end of this guide, you’ll know exactly how to register, verify, and troubleshoot your Globe SIM—step by step.
Who Needs to Register Their Globe SIM?
You MUST register if you fall under any of these categories:
Required Documents for Globe SIM Registration
To register your Globe SIM, you need to provide your correct personal information along with a valid ID. Here are basic requirements for all users and valid ID list:
Basic Requirements for All Users
Valid ID List
Methods to Register Your Globe SIM
Below are the three official methods you can use to register your Globe SIM card. Each option is designed to suit different users based on the device, location, or the kind of support you may need.
- Online Registration through the Globe SIM Registration Website
- Registration via the GlobeOne App
- Registration at Globe Stores or Authorized Centers
- Assisted Registration for Seniors and Persons with Disabilities (PWDs)
- SIM Registration for Minors
How to Register Your Globe SIM Online via Website
This is the fastest and most convenient way to register your SIM. You can do it using any smartphone, tablet, or computer with internet access.
Follow these steps to register your Globe SIM online:
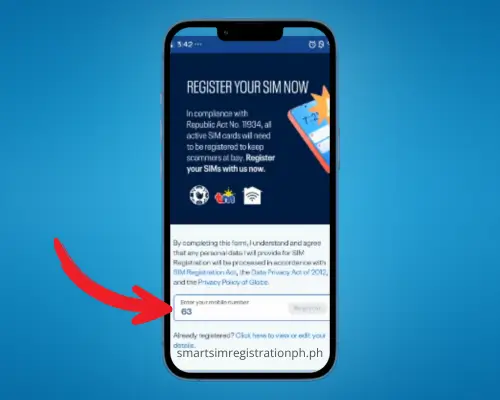
Step 01: Open new.globe.com.ph/simreg in your phone or computer browser. Enter your mobile number and click register SIM.
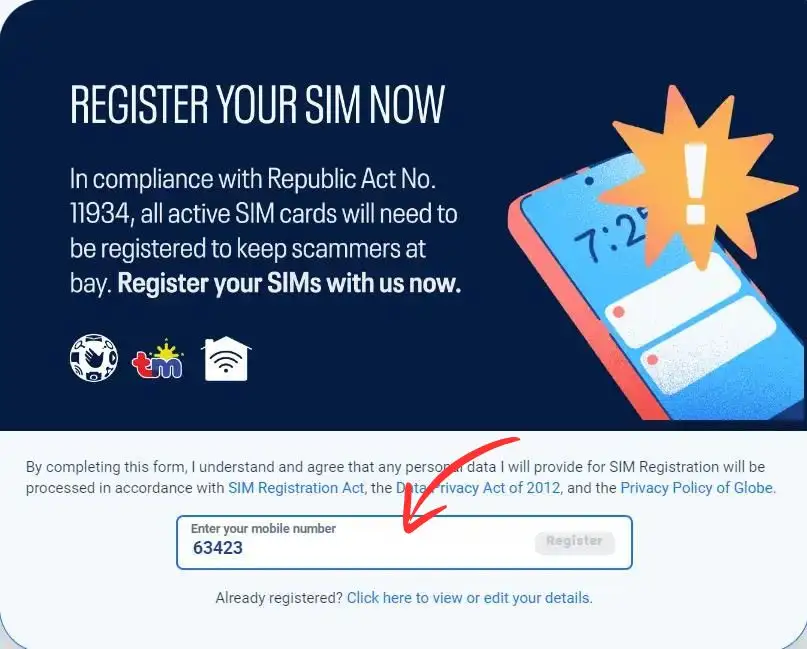
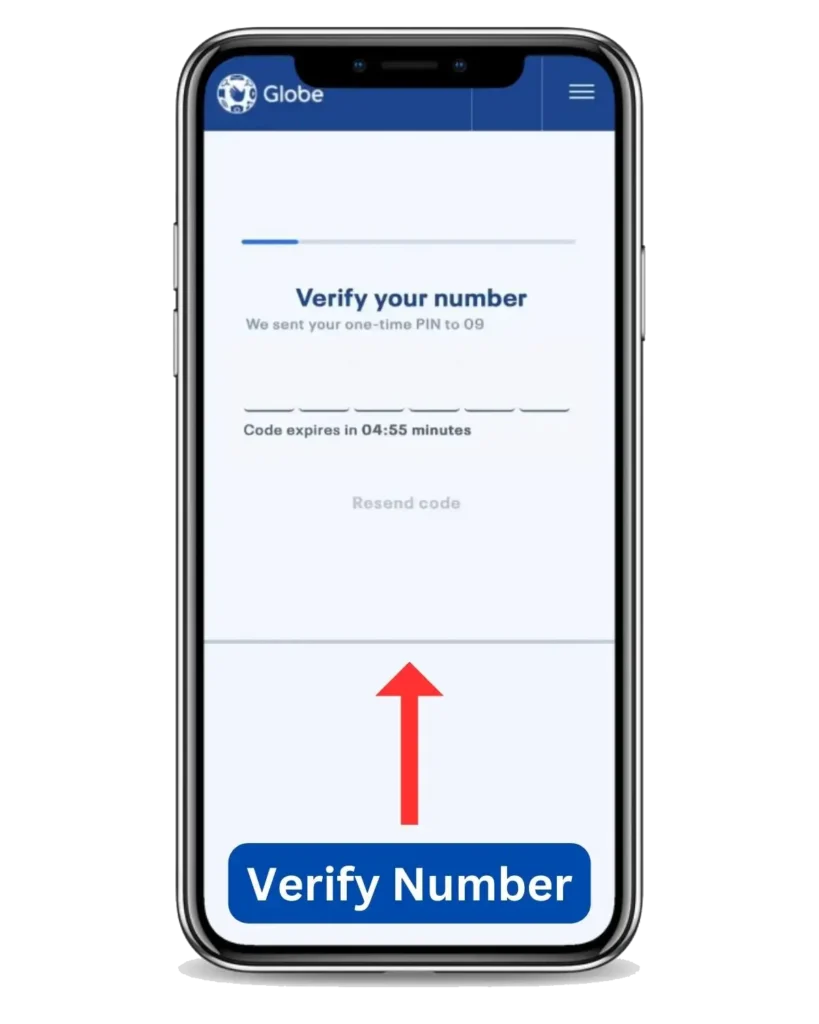
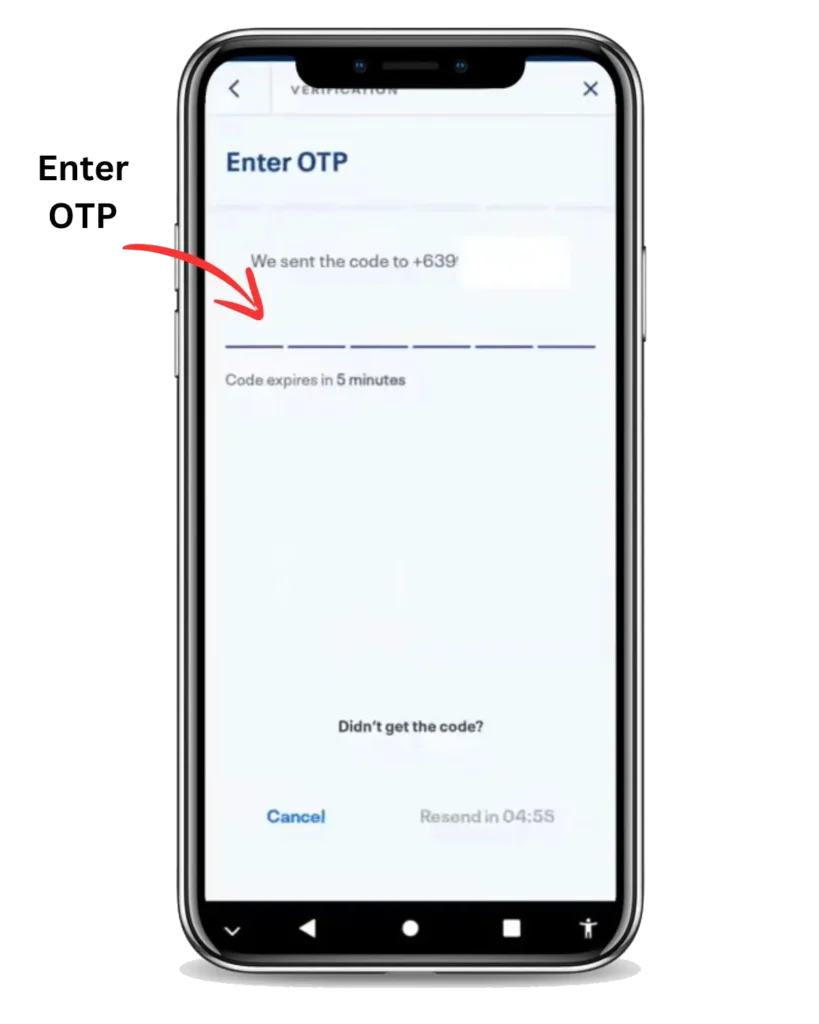
Step 02: Type your 10-digit Globe mobile number (without +63) and click Register. Check your phone for a One-Time PIN (OTP) and enter it on the website.
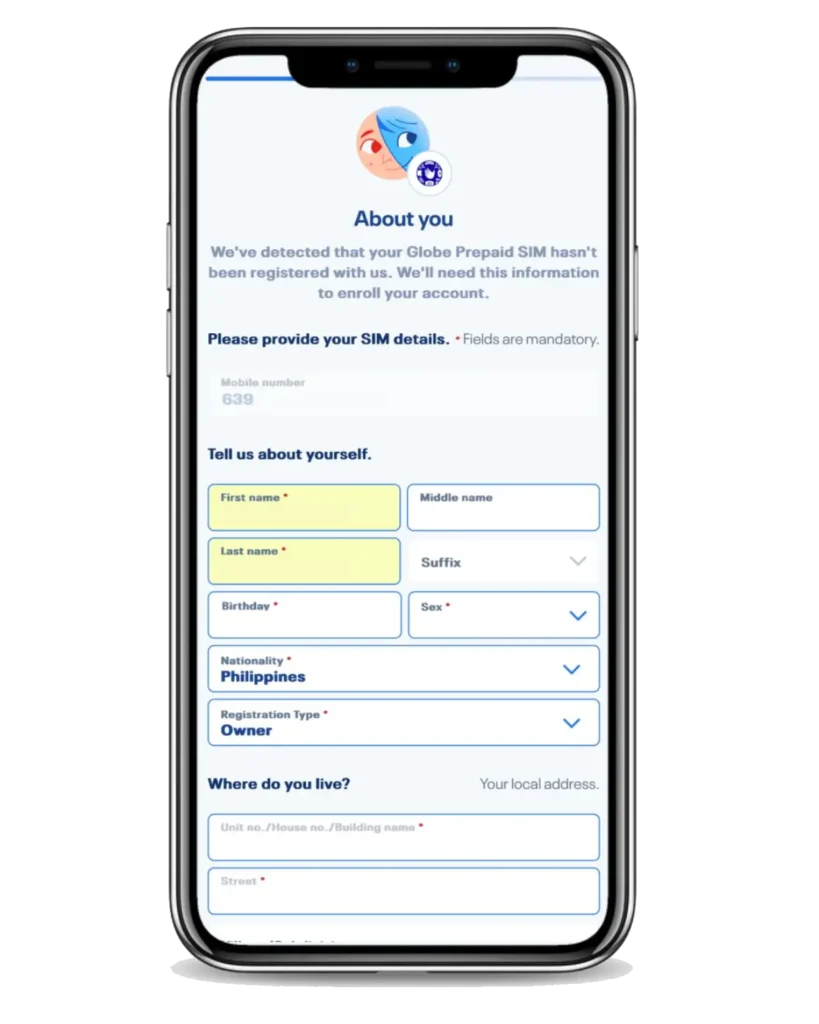
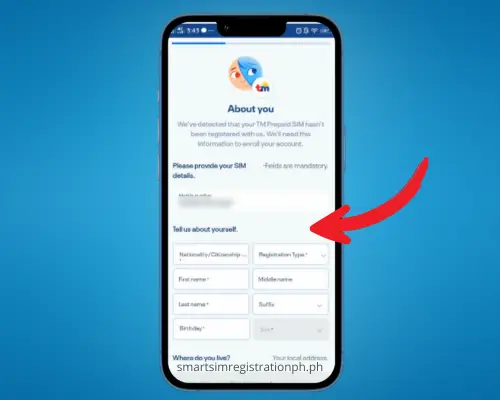
Step 03: Fill in Your Personal Information. You’ll be asked to enter:
- Full Name (as shown on ID)
- Birthday
- Sex (Male/Female)
- Nationality
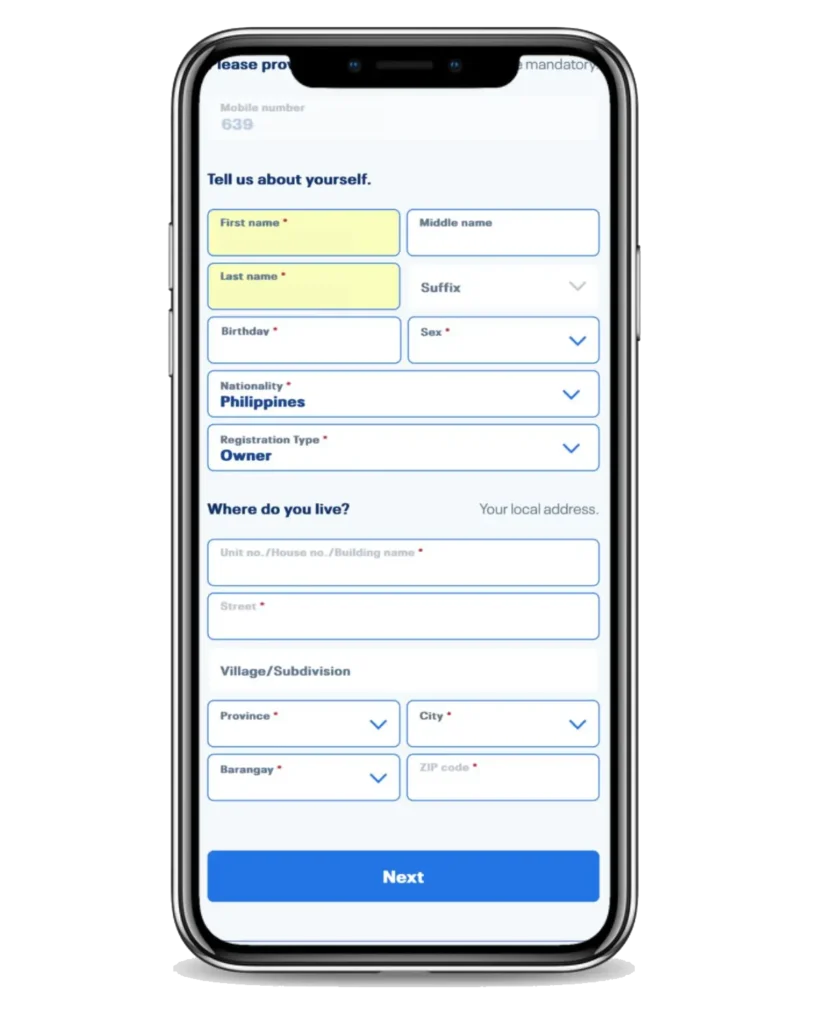
- Home Address (complete)
- Email (optional but recommended)
Use accurate data. Your info must match your valid ID.
Step 04: Choose 1 government-issued ID from the accepted list. And upload a clear photo of your ID (clear, front side) and a Selfie (your face must match the ID).

Step 05: Check the box to agree to Globe Privacy Policy and SIM Registration Act compliance. Then click “Submit”.
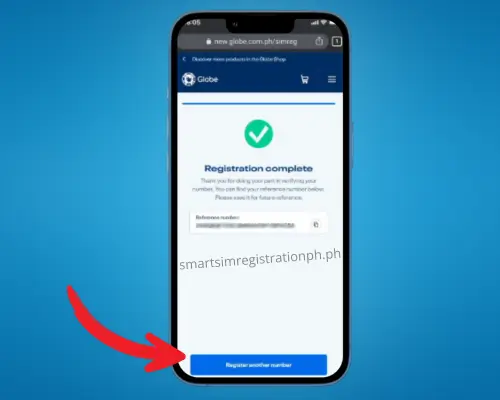
Step 06: Tap Submit and wait for a message from Globe confirming your registration. Copy or screenshot the Reference Number. Save it in case you need proof later
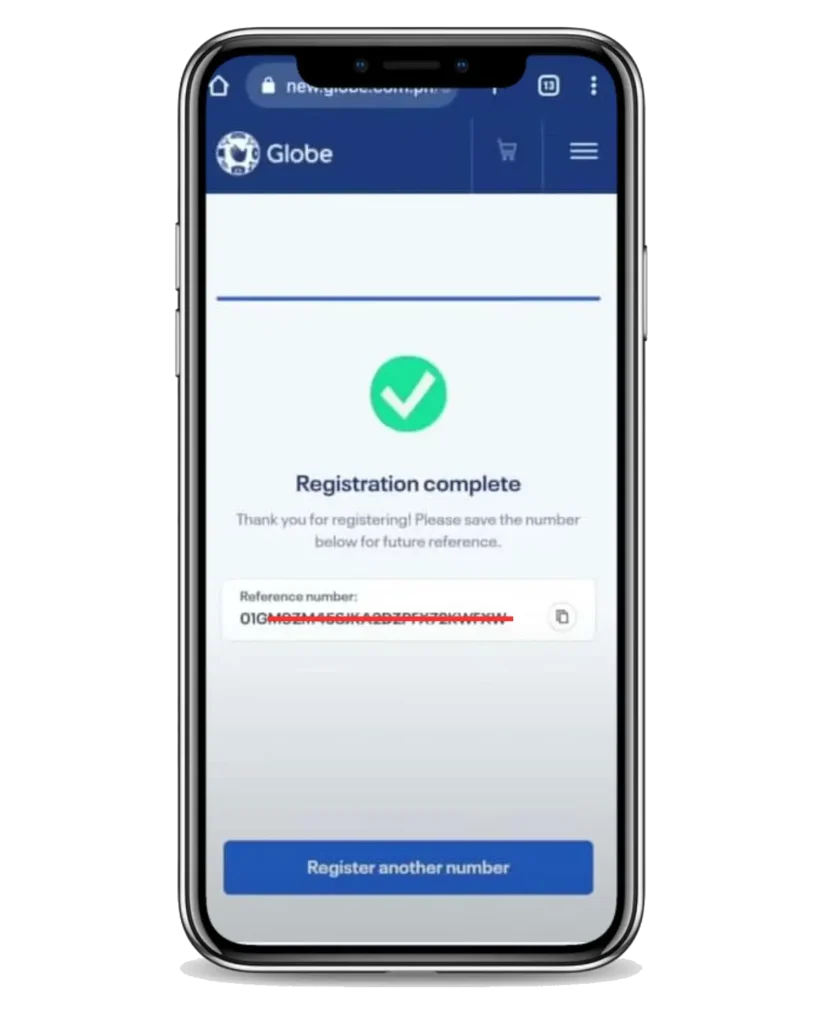
Your SIM is now registered. In most cases, the registration is activated within minutes. For some users, Globe may verify details manually within 24 hours.
How to Register Your Globe SIM via GlobeOne App?
If you already use the GlobeOne App, this is the easiest way to register or verify your SIM. The app can automatically detect your number and pre-fill your details.
Best for: Existing Globe prepaid/postpaid users, WiFi users, people who prefer apps
- Download the GlobeOne app from the Google Play Store or Apple App Store. Then install and open the app.
- If you already use the app → Log in. Tap “Create an Account” or “Get Started” if you don’t have an account.
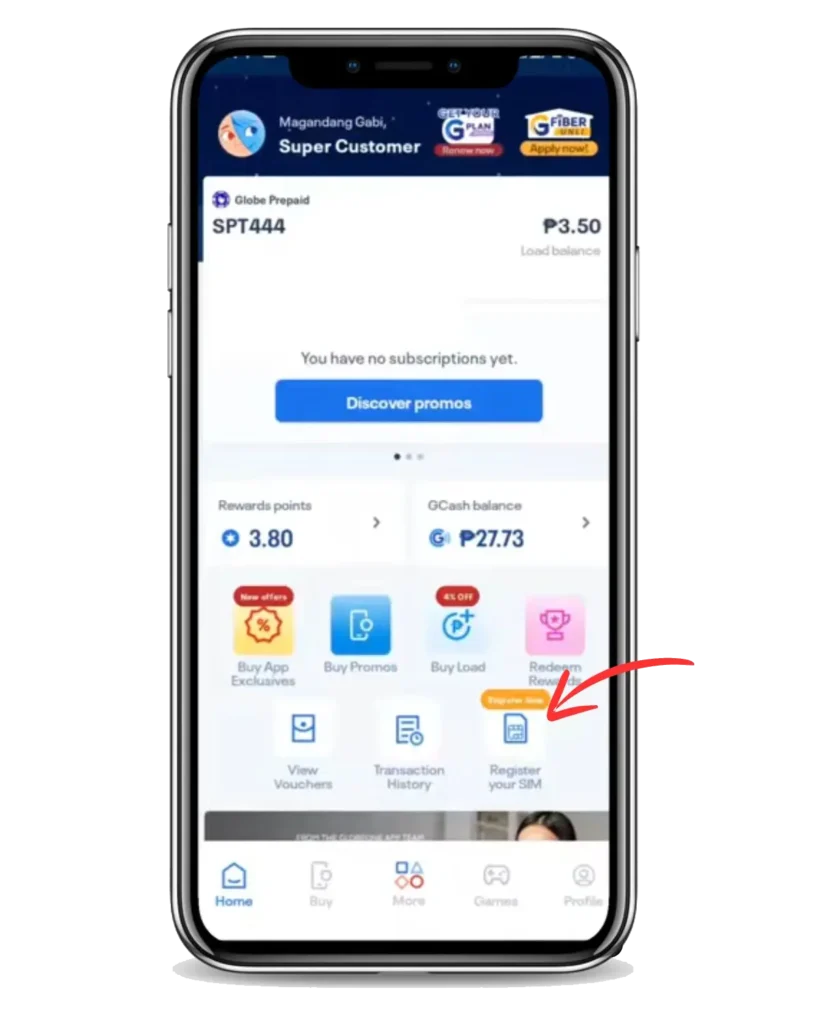
On the home screen, find and tap your Globe number. If you have multiple numbers linked, select the one you want to register.
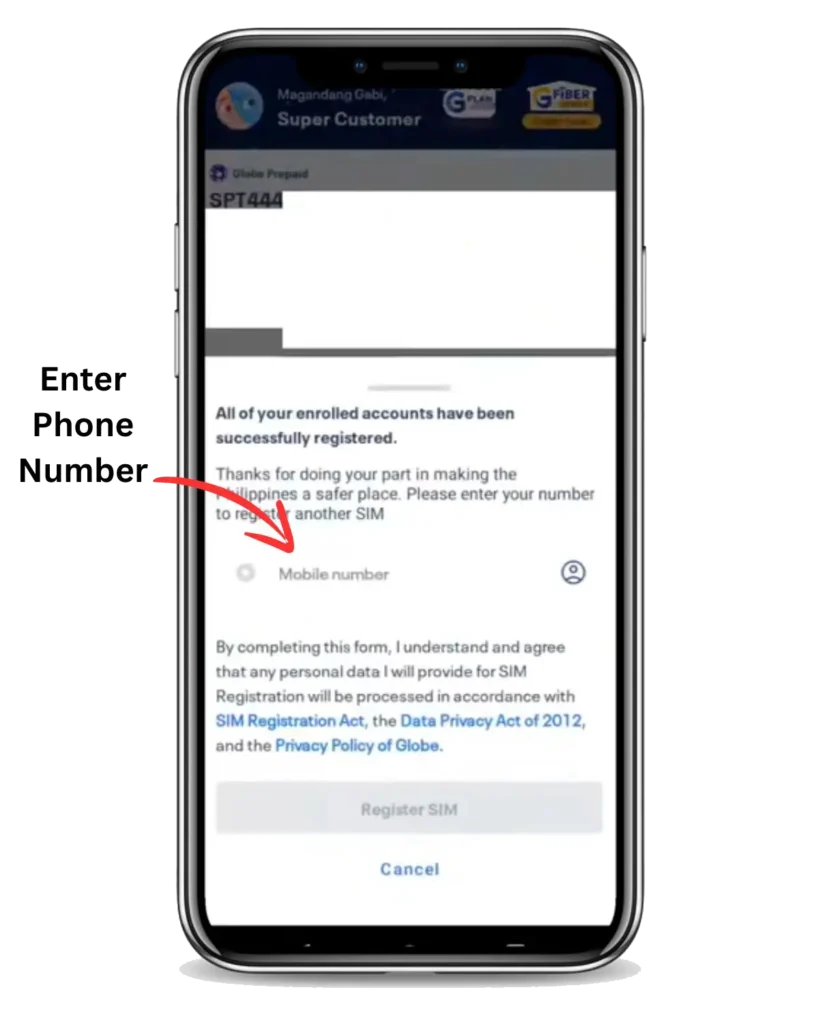
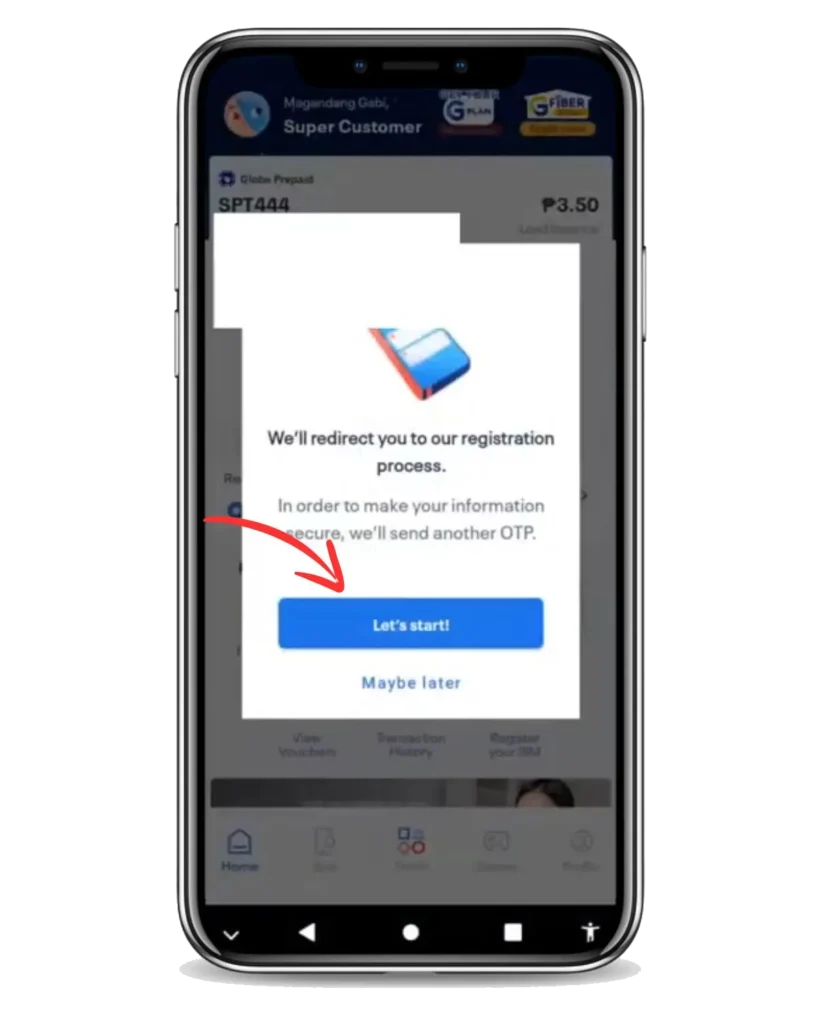
- Wait for a One-Time PIN (OTP) sent via text and enter it in the app. After account setup, tap “Register Your SIM” on the dashboard
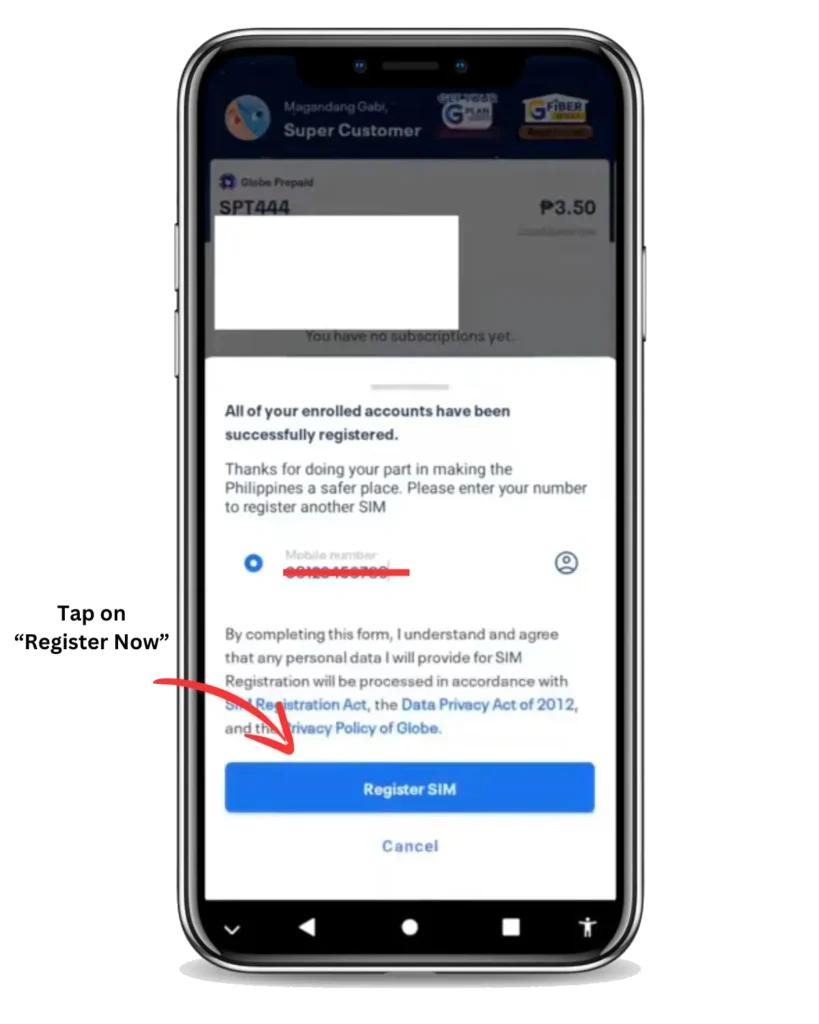
- Enter your personal information including your full name, date of birth, sex, and complete address. Then Upload a clear photo of a valid government-issued ID.
Take a live selfie using your device’s camera. Tap Submit and wait for the confirmation message from Globe.

Make sure your app is updated to the latest version and your internet connection is stable for a smooth registration process.
Common GlobeOne App Issues (Quick Fixes)
| Issue | Solution |
|---|---|
| App not loading | Update to the latest version |
| “Register SIM” not showing | Your SIM might already be registered |
| Error after upload | Check ID clarity & file size |
| Stuck on loading screen | Clear app cache or reinstall |
| Can’t log in | Reset password or use email login |
Registering at a Globe Store or Assisted Registration (For Seniors, NO Internet, or Special Cases)
If you are not comfortable using online tools or mobile apps, you can register your Globe SIM by visiting the nearest Globe Store or an authorized registration center. Use Globe’s store locator to find the nearest Globe Store or authorized retailer in your province, city, or barangay.
Where Can You Register In-Person?
You can visit any of the following:
What to Bring
Prepare the following before going:
You do NOT need an appointment in most stores, but some busy locations may require queueing.
Step-by-Step Process (In-Store)

- Go to the Globe Store or Booth. Ask the staff for SIM Registration Assistance. (Staff will give you a form or digital tablet.)
- Provide Your Mobile Number. The representative will enter your Globe/TM/GOMO number.
- Show Your Valid ID. They will either scan or take a photo of your ID.
- Provide Personal Details. You will be asked for Full Name (as shown on ID), Birthday, Sex, Nationality, Complete Address, Email (optional but recommended)
- Some centers may take a live photo of you for identity verification.
- You will be asked to double-check information, sign consent (paper or digital) and then confirm submission.
- The staff will provide a printed slip or SMS with your Reference Number. Keep this as proof of registration.
Special Cases Handled In-Store
| Scenario | How Globe Handles It |
|---|---|
| Senior citizen can’t fill out form | Staff assists or relative can help |
| Minor under 18 | Must be registered under parent/guardian |
| Lost ID | May need barangay certificate or supporting documents |
| SIM damaged/inactive | Staff may assist with SIM replacement + registration |
| Corporate/business SIM | Company representative handles paperwork |
| No ID | Some LGUs issue temporary IDs (case-by-case) |
Globe SIM Registration for Postpaid Users
If you are a Globe Postpaid user, the good news is that your SIM is already registered by default. When you applied for your postpaid plan, you submitted your personal details and a valid ID, which Globe used to automatically register your SIM.
You can check your registration status by logging in to the GlobeOne App or visiting the official registration website. If your SIM is already registered, you will see a confirmation message.
How to Register a Globe At Home Prepaid WiFi SIM?
To register your Globe At Home Prepaid WiFi SIM, you need to complete the registration online using your mobile device. Globe At Home SIMs are not registered by default, so you must do this to keep your internet working and follow national SIM registration rules.
Step 01: Open your browser on any phone or computer connected to your Globe At Home WiFi. Visit the SIM registration portal by typing new.globe.com.ph/simreg by clicking to it.
Step 02: Enter your Globe At Home number. This is usually printed on the modem box or device label. It starts with 0917, 0956, or another Globe prefix. Click “Register” to begin.
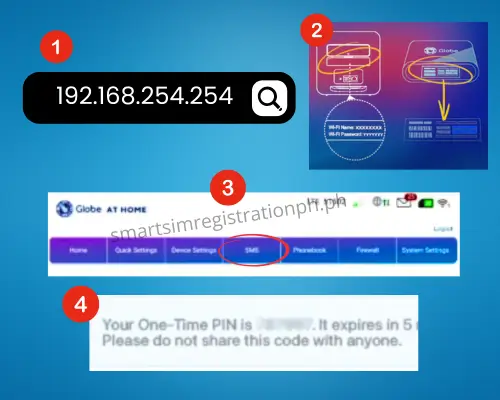
Step 03: Receive the OTP (One-Time Password). The code is sent to your modem. To read it:
Step 04: Enter the OTP into the website to verify your number. And Fill out the form with your personal information.
Rest of the things are same as registering your globe SIM online or via globeone app. At the end you will see a confirmation screen with a reference number. Take a screenshot or write it down.
Where to Find Your WiFi SIM Number
If you don’t know your Globe At Home number:
- Connect a phone to your Globe At Home WiFi.
- Open your browser and go to 192.168.254.254.
- Log in using the default username and password (found on your modem’s sticker).
- Your SIM number should appear on the home screen or under “Device Information.”
How to Activate Your Globe SIM Card
After buying a new Globe SIM card, you need to activate it before you can call, text, or use mobile data. The activation process is quick and can be done by simply inserting the SIM into your phone and following a few basic steps.
Once you complete these steps, your SIM is ready to use. You can start sending messages, making calls, and using data.
If your new Globe SIM doesn’t start working after inserting it into your phone, there’s no need to panic. Sometimes, activation can be delayed due to simple issues like signal problems, phone settings, or a faulty SIM slot.
Note: In most cases, a Globe SIM usually activates within minutes after insertion, but it can take up to 24 hours if the network is busy or the SIM wasn’t used right away.
Once you finish registering your Globe SIM, it’s important to check If Your Globe SIM Is Registered or not you can check out to this guide for it.
Deadline for SIM Registration in the Philippines
The final deadline for SIM registration in the Philippines was July 25, 2023. This applies to all users of prepaid SIM cards, including those using Globe, Smart, DITO, and other local networks.
If you did not register your SIM by the July 25, 2023 deadline, it is now deactivated. You will no longer be able to make calls, send text messages, or access mobile data using that number. Any remaining load or active data promos linked to the SIM have been removed and cannot be recovered.
Can You Still Register After the Deadline?
No, late registration is not allowed once the SIM is permanently deactivated. The National Telecommunications Commission (NTC) and major telecom providers have confirmed that unregistered SIMs after July 25, 2023, cannot be reactivated.
If your SIM was deactivated, the only option is to:
If you want to redeem Globe Rewards Points after activating your globe SIM, go to this
After globe SIM activation, Globe Rewards lets you earn points every time you load, pay your bill, or use Globe services. You can check out to this guide to Redeem Your Globe Rewards.
Troubleshooting Most Common Globe SIM Registration Problems
Even when you follow all steps correctly, errors can still happen. Globe’s system may fail, IDs may be rejected, or the OTP may never arrive. Follow all the possible solutions below to register your SIM without any problem.
1. Didn’t Receive the OTP Code
The One-Time Password (OTP) is needed to access the registration form. If you didn’t get the code:
To fix this:
2. Invalid ID or Photo Upload Failed
The system might reject your photo or ID if the file is blurry, too large, or not supported.
To fix this:
3. Registration Page Not Loading
Sometimes the SIM registration site won’t load due to technical issues or poor connection.
Try these steps:
4. Entered Wrong Information
If you accidentally entered incorrect details (wrong name, ID number, or address), don’t panic.
Here’s what you can do:
5. SIM Already Registered but Getting Prompts Again
Sometimes you may get a message saying your SIM isn’t registered, even if you’ve already completed it.
What to check:
6. Using a SIM in a Device That Doesn’t Receive Messages
This is common for WiFi devices like Globe At Home modems.
Solution:
7. Foreigners and Roaming Users: No Signal or Access
If you’re a foreigner or OFW using roaming:
Here’s what you can do:
8. Account Already Linked to Another SIM
Some users get an error saying their ID or information is already linked to another number.
Here’s how to handle it:
If you purchased it from someone else or don’t know the previous owner, it may be safer to register a fresh SIM with your own ID. Globe prioritizes legal ownership and identity, so they will require proof before transferring any SIM.
Frequently Asked Questions
How do I know if my Globe SIM is registered?
Check using the GlobeOne App or dial *143# → My Account → SIM Registration Status. If it says “Registered,” you’re good. If it asks you to verify or register, take action immediately.
I registered but didn’t get confirmation. Am I still registered?
Most likely yes. Confirm using the app or *143#. Globe sometimes delays sending confirmation messages. If status still shows “pending” after 48 hours, contact Globe support.
Can I still register a SIM that was deactivated?
If it was deactivated recently, go to a Globe Store with your ID and they may recover it. If it has been inactive for months or reassigned, it cannot be restored.
Someone else registered my SIM. What can I do?
Visit a Globe Store with your ID and proof that you own the number (GCash, load history, SIM card, etc.). Globe can reset and transfer it to you.
Can minors (under 18) register?
Minors can use a SIM, but it must be registered under a parent or guardian using their valid ID. The adult is legally responsible for the number.
Why is Globe asking me to update my registration?
Your ID may have expired, your info may be incomplete, or Globe is doing a data review. Update right away to avoid possible blocking or deactivation.


2 Comments